Building an online community is an important step for any growing business. It can help you get in touch with your key demographic, gather insights, promote your business, increase consumer loyalty and more.
If you want consumers to take an interest in your brand and keep on coming back for more, these factors are essential to cover.
If you want to start building a community, look no further than the world’s most popular social network: Facebook. On Facebook, you can easily create a group that caters to your audience.
Who Can Benefit from Facebook Groups?
Business owners and marketers can use Facebook groups to provide ongoing support, updates, and promotion to an audience that has already shown an interest in their products or services.
It’s a chance to convert the ‘just curious’ into paying customers, as well as to ensure your previous buyers are likely to make another purchase in the future.
Although many brands have moved on to Pages, Groups are still a great way of keeping in touch with your customer base.
There are also industry-focused groups that allow professionals from within that industry to discuss ideas, trends, and experiences, so take a look at some existing groups if you’re in need of some inspiration.
How to Create a Facebook Group for Your Business
If you’ve never created a Facebook Group before but would like to give them a try, it’s easy to feel intimidated. The good news is it’s easier than you think.
Step #1: Enter in the URL Faecbook.com/Groups
First, to set up your Facebook group, head over to facebook.com/groups.
Step #2: Select “Create Group”
In the top right, you’ll see the green ‘Create Group’ button. Give it a click, and you’ll be prompted to select your group’s ‘goal’.

Pro tip: You’ll probably want to choose ‘Connect and Share’, as your goal is to connect with group members and provide ongoing support.
Step #3: Create a Name for Your Facebook Group
Next, you’ll need to give your group a name. Make sure it’s one that will resonate with your audience – ideally mentioning the name of your business.
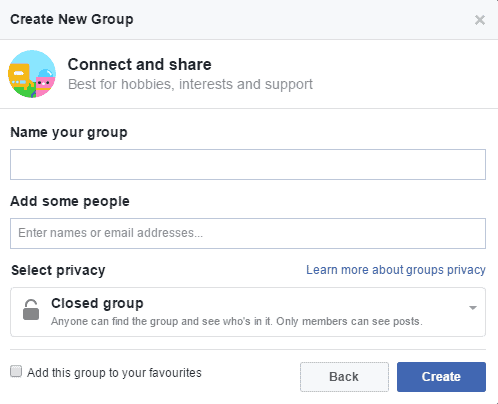
Step #4: Invite Your First Members
You’ll also have the opportunity to add your first members to the group, so invite people you know will have an active interest in your business, such as your colleagues or a supportive friend.
Pro Tip: It’s a good idea not to add any potential customers to the group until you’ve finished setting it up – you’ll want them to see it at its best!
Step #5: Set Your Privacy Setting
Finally, you’ll also need to select your group’s privacy setting. Public groups are open to all. Closed groups can be found by anyone but only members can see posts. Secret groups are – well, secret! Only selected members can locate or view a secret group’s content.
Step #6: Add A Group Description
Now it’s time to add a description for your newly created Facebook group. Use it to describe what the group is, who it’s for and how Facebook users can benefit from joining. This is also the time to choose a cover photo for your group, so choose one that accurately reflects your services.
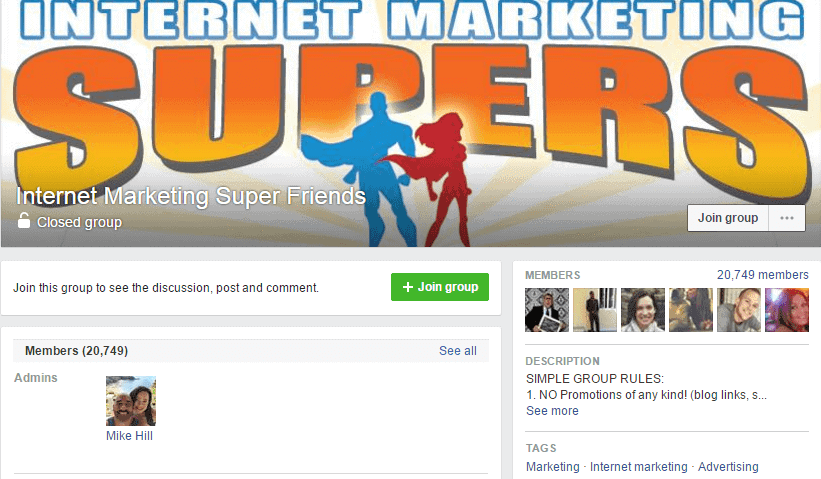
In this example, we can see how the owners of this industry discussion group have added a bright and eye-catching cover photo that also accurately represents what the group is about and who it’s for.
Try to create an image that makes the group appear inviting, while also featuring your company logo or tagline to ‘brand’ it as your own.
Step #7: Promote Your Group
Once your freshly-created Facebook group is looking the part, the final step is promoting your group to encourage users to join. You could try:
- Including the link to your group in newsletters or correspondence with existing customers.
- Posting about it on your social media pages and pinning the post or tweet for extra visibility.
- Using paid ‘boosts’ to promote posts about the group.
- Directly inviting people who may be interested.
The Group is Up and Running – What’s Next?
After your group is up and running and you’ve accumulated some members, you’ll need to work out how to keep them engaged and active within the group.
Post regularly to ensure there’s always new content to discuss.
Keep up with hot industry topics that your audience will appreciate being made aware of, and don’t hesitate to ask them questions. A question almost guarantees an engagement boost as users drop their answers in the comments.
Share content other than your own.
By sharing relevant articles and updates, your audience will see your group as an authentic and authoritative source of information, rather than a place for non-stop promotion of your products.
Use Facebook features such as Facebook Live to build relationships and recognition.
You’ll be able to show your audience the ‘real’ you – someone they can trust rather than a faceless brand. This is also an opportunity to show off your latest products, host a Q&A or give group members an exclusive insight into what goes on at your brand’s HQ.
Create Facebook Ads to attract new members and promote your group.
Paid ads can be set to appear as ‘suggested’ to your intended audience. By attracting more members, you’ll have a wider fan base to promote to within the group.
Although your audience will respond well to different approaches depending on the demographic they fall into, these are a great place to start. As the group develops, you’ll learn more about what works and what doesn’t – so don’t be afraid to test the waters with new ideas.
So now you know how to create a Facebook Group, promote it and ensure it serves its purpose – what’s stopping you? Give it a try, and you’ll soon find yourself enjoying the benefits of using Facebook Groups for business.