Learning how to schedule multiple posts on Facebook is a valuable skill. Not only does it save you time, but it also allows you to automate your social media marketing processes, allowing you to deliver consistent, high-quality content to your social media audiences.
In turn, this allows you to connect and engage with a far greater number of people, spreading your brand’s message far and wide.
Scheduling also has the power to shape a more considered approach to your social media marketing. It gives you the freedom and the foresight to be able to create well-considered, strategic posts ahead of time that engages your audience and serves your larger business goals.
Scheduling a Post on Facebook
When you schedule multiple posts on Facebook or any of your other social media platforms, automating your social media posting becomes even easier. But first, it’s helpful to understand the process of how to schedule posts through Facebook.
Scheduling a post on Facebook is fairly simple, however, you want to ensure you don’t make any mistakes when scheduling or your post could go live at the wrong time or publish with incorrect copy, images, or links.
How to Schedule Posts on Facebook
Even though bulk scheduling your posts is much faster than the tedious process of scheduling single posts one by one, sometimes you will only need to schedule a single Facebook post. In those scenarios, just follow these simple steps.
Firstly, head to your business’ Facebook page.
Step 1: Create Your Post
To create your single Facebook post, head to the top of your Facebook page.
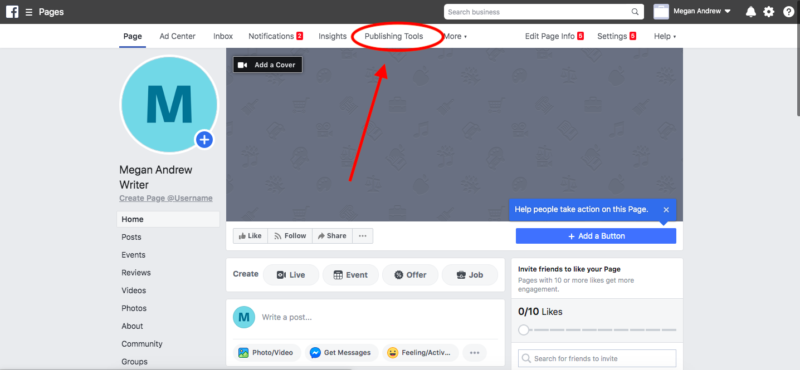
From there, click “Publishing Tools,” followed by “Create Post” on the main screen of this page.
Alternatively, you can go straight to the main feed on your Facebook page. There you will spot the box you’ll be using to create your post, just like you would see on your own private Facebook page.
Click the box and add your copy, images, or links as needed, to create your post.

Step 2: Create Your Schedule
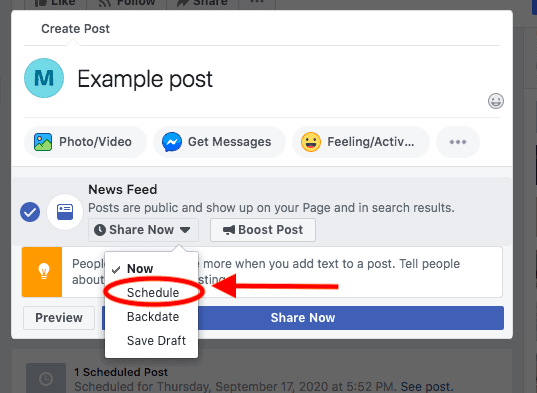
Next, you need to schedule your post. When you click the dropdown on the “Share Now” button, you’ll see a menu with a few options. If you need to save your post draft until later, you can hit “Save Draft” to do this.
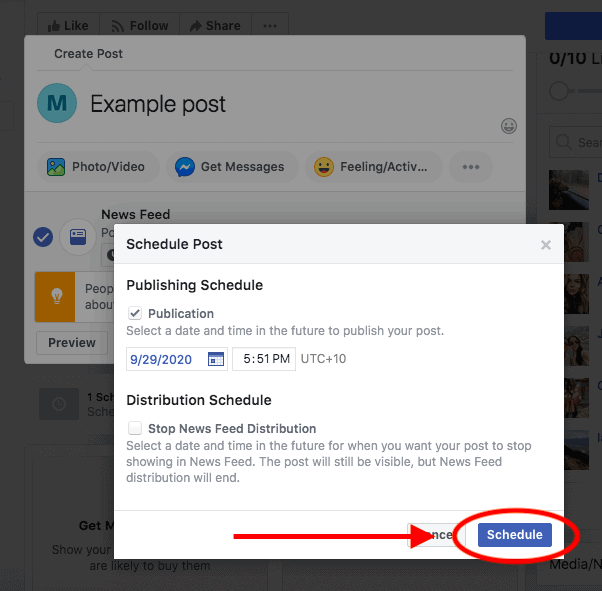
Or, if you’re ready to schedule, hit “Schedule”. From there, you’ll be able to choose which date and time you’d like to post.
The date and time you settle on is, ultimately, up to you. If you’re just starting out, you might want to test different times and then review your reporting to assess which time slot tends to perform best for your business.
Once you’ve decided on a time, hit “Schedule”.
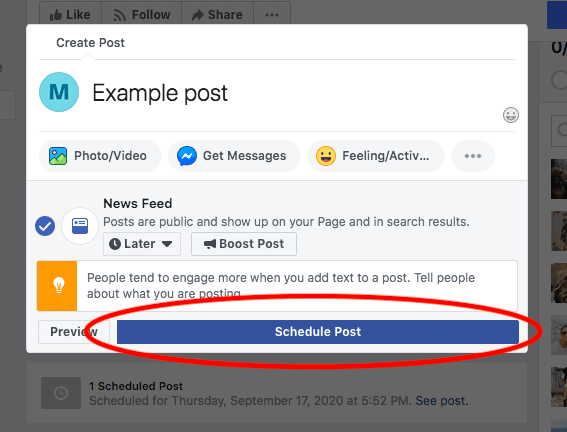
Step 3: Schedule Your Post
From there, simply click “Schedule Post” and you’re done! Congratulations, you’ve just scheduled a Facebook post.
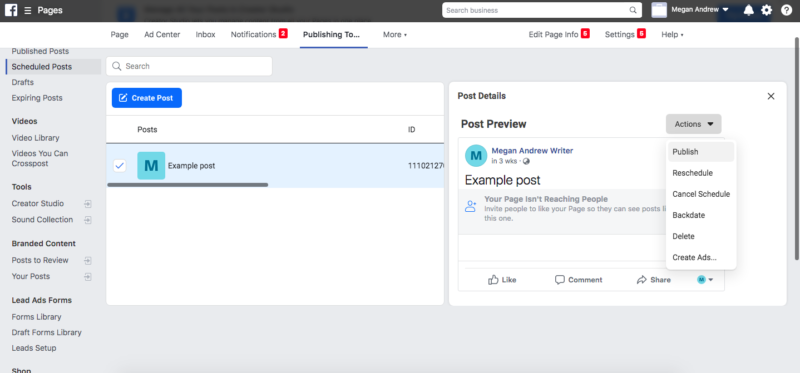
If you need to make changes to your post, delete it or change the post time, click “Publishing Tools” on your page.
Click “Scheduled Posts” and then find the scheduled post you’d like to edit. Click on the post, then click “Actions”. From there, you can publish your post immediately, reschedule it to a different date, backdate it or delete it completely.
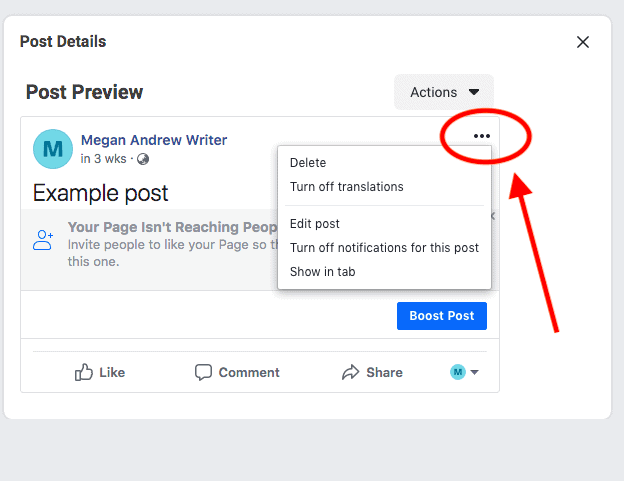
If you click the three small dots on the post, you can edit your post. From there, simply make any edits to your post copy and save
How to Schedule Multiple Facebook Posts at once
Although it is handy to know how to schedule single posts on Facebook, it can be time-consuming, especially if you’re trying to schedule a few posts at once.
Bulk uploading can be helpful, particularly if you’re managing social posts for events, coordinating a launch, or managing multiple social media platforms at once.
There are tools that can be used to schedule multiple posts on Facebook and your other channels.
The MavSocial “Bulk Upload” function allows you to schedule multiple posts on a range of social channels, such as Facebook, Instagram, Twitter, LinkedIn, or Google MyBusiness, using a simple Excel sheet template. In fact, our Bulk Uploader allows you to schedule over 100 posts at a time to your Facebook profiles.
So, without further ado, here’s how to schedule multiple posts on Facebook.
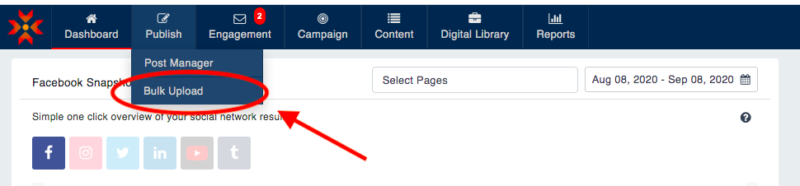
Step 1: Set Up Your Upload
First up, log in to MavSocial and hover over the “Publish” button at the top navigational bar on your screen. Hit “Bulk Upload”.
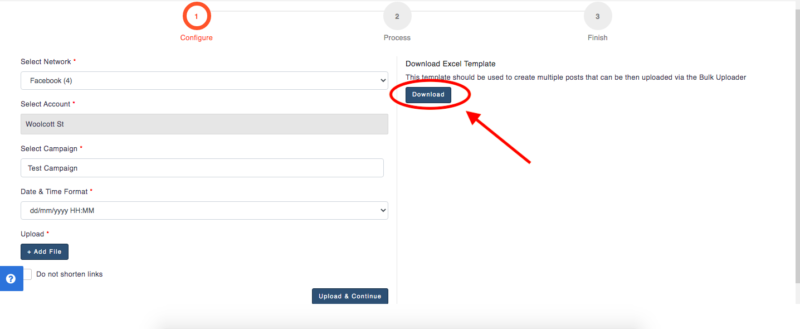
From there, select your campaign details on the left-hand side of the screen. If you don’t already have a campaign to use, you can quickly and easily create one in the “Campaign” section. All your posts will need to be added to a campaign.
Campaigns are handy, particularly for events or campaigns that might be running within a certain period. Campaigns can help you organize your content far more effectively. It can even enable you to create separate campaign-based social posts so you can differentiate these from your other regular weekly content.
They also allow you to use grouped posts within campaigns and aggregate your reporting data for a more holistic view of campaign performance.
Once the details on the left-hand side of the screen are filled out, hit “Download” to access the Excel template which will be set up in the exact format you’ll need to be able to upload your posts.
Step 2: Enter Your Posts
Once you have downloaded the template, you just need to follow the instructions within the template and enter the information for all your posts. This will save you a significant amount of time in the long run, especially if you have a large number of posts to upload, or if you’re repeating the same posts across different channels.
To add your images within the Bulk Uploader, you have two options.
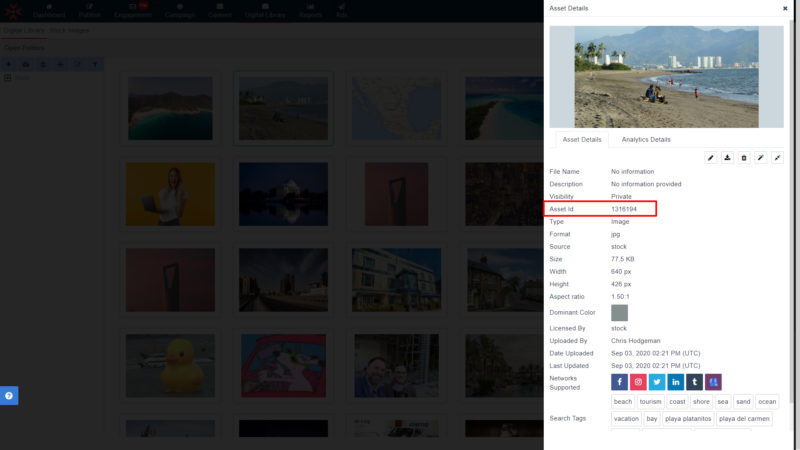
You can add images that you’ve already uploaded into your Digital Library; the built-in asset management system within MavSocial. In this case, you can simply copy the Asset ID from the asset details in the Digital Library and paste it into the ImageID/VideoID column in the spreadsheet.
Alternatively, you can add images using a URL if that image is found somewhere online. If you’re using an image URL, simply copy the URL from wherever your image is hosted online and paste it within the sheet.
This can be very useful when re-posting images from, say, Instagram; just be sure to attribute other user’s images correctly if you are using this process.
Step 3: Upload your file
Add your file by clicking “Upload”. Be sure to select the correct date and time format that you’re using in your spreadsheet and make sure that the time zone is set in the correct city to begin with!
When your file is ready, hit “Upload & Continue”.
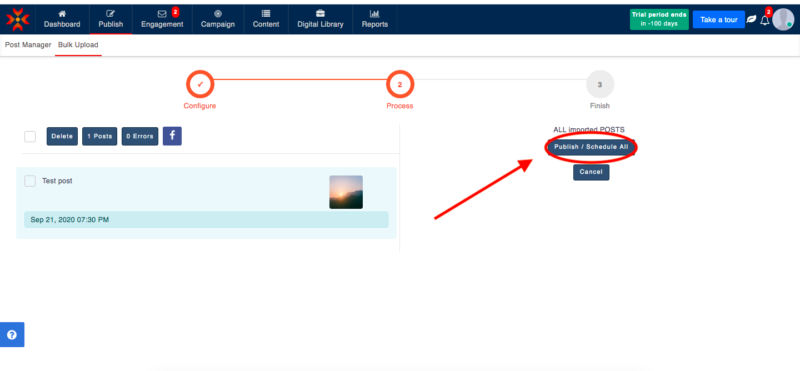
From there, you’ll see a summary screen with your posts. If there are any errors, they will appear on this screen. Common errors might include your post copy being too long or your image size being incorrect.
These issues can be easily fixed by clicking on the post before you continue.
Once any issues are resolved, click “Publish/Schedule All” to proceed.
Step 4: Check your schedule
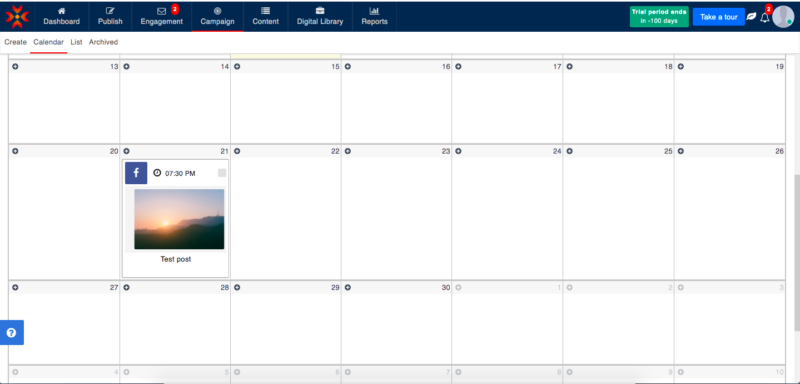
Now that you know how to schedule multiple posts on Facebook, all you need to do is check your work. To check posts, simply click “Campaign,” at the top navigational bar, then hit “Calendar”.
You’ll be able to view your post and click on it to check the copy, image, or time if needed.
You can even click on your posts to delete or edit them as needed if your campaign is likely to change over time. So, there you have it! The MavSocial Bulk Upload tool is far simpler than uploading posts one by one.
The more you can automate your social media processes, the better, and once you have practiced this process, it will become even faster and more intuitive over time.
Once you’ve nailed posting multiple posts, you can even create repeating queues for content you might want to post several times; for instance, important Facebook posts or interesting Tweets.
Find out how to create a repeating queue here. Now that you’ve learned how to schedule multiple posts on Facebook, you can start to be much more efficient and more consistent with your posting. Your audience will learn to expect fantastic content from you, will stay engaged, and keep coming back for more.
For more information and troubleshooting, click here to learn about bulk uploading.